Hi there! I'm back to share the final details for completing Baby Worth's new room. I already had a fabulous red and white print fabric which I purchased at Robyn's Fabrics. I LOVE this print. I think it lends a touch of whimsy to the room with the trees, little deer and birds on it that appear to be passing through a forest. Fun for a child's room but also pretty hip for adults. I first used the fabric to make a pillow cover for the bed using a lumbar insert I already owned. Then, I used the same fabric to make customized letters for the room. Truth be told, I'm personally kinda burned out on the letter thing, but I thought it would be another easy and personalized way to tie things together.
I spent some time determining how I would affix the fabric to the wood letters. I decided I wanted to apply padding to the letters to add some depth, so I used batting I had purchased for another project which I never got around to completing--or starting for that matter! Yay... free material for this project anyway! I tried doing this first using a staple gun, and while the batting stretched fine around the letters, the fabric did not. Total mess. So, then I traced the letters onto the batting and cut them out. Then, I traced the letters onto the fabric and cut that out. I followed the instructions conveniently located on the back of the batting to iron it to the fabric. Who knew?! First time I've used batting, and it worked! I then just glued the new cut batting and fabric to the letters.
I found a home for the letters right over the rocker. I liked it but felt like the letters were kind of "floating" on the wall and needed some grounding, which you can see in the below picture.
So, I decided to glue add some black grosgrain ribbon around the edges of the letters. The letters were probably only an inch deep at most, but again I didn't want to spend any money, so I ended up using some left over 2 1/4 inch ribbon I had for the bed skirt. I wanted a nice edge, so I ended up attaching the finished edge of the ribbon to the edge of the letters then glued down the extra ribbon to the back of the letters. It was pretty time consuming, and it definitely would have been easier using ribbon that was the proper width, but whatever... paid nothing, gained experience, super happy with the outcome...
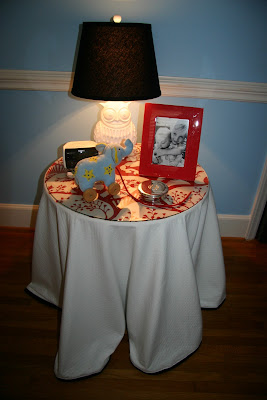
I also used some of my red and white fabric to jazz up the table top a bit. I really like the way this looks.
I hope you have enjoyed this step by step tour of Baby Boo's room. I think he's totally living in style! Do you? I hope everyone has a wonderful, safe and Happy Thanksgiving!! Whitley


No comments:
Post a Comment
Your comments make my day! Thank you!
Also follow the Queen City Style on Facebook, Twitter, Instagram and Pinterest!